Mood lighting

TreeBurst Vert_IR.jpg

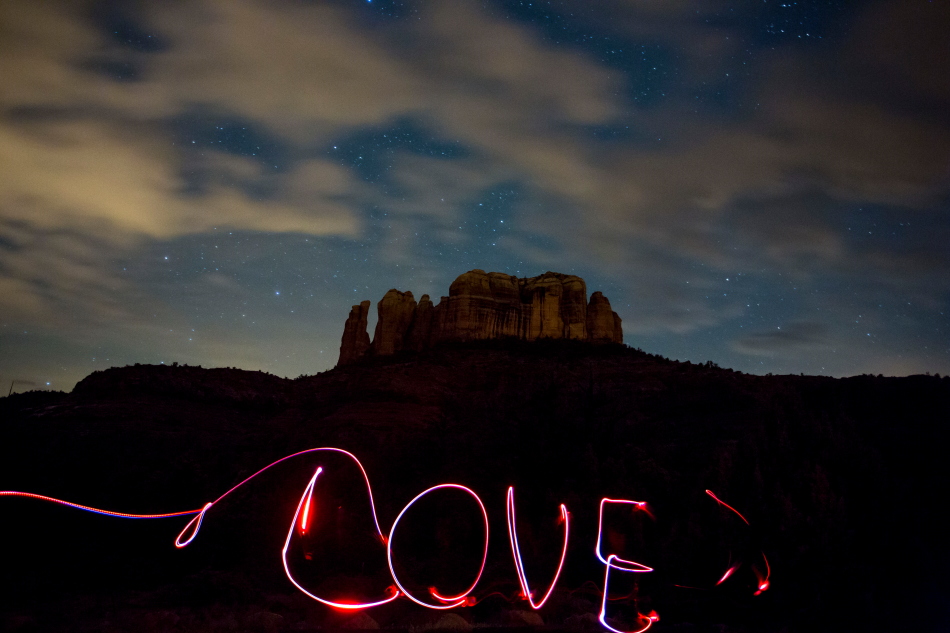
As I continue to improve my photography, I think about what that means.  It’s all about the light – dawn & dusk, we are so often told.

BeamRight_IR.jpg

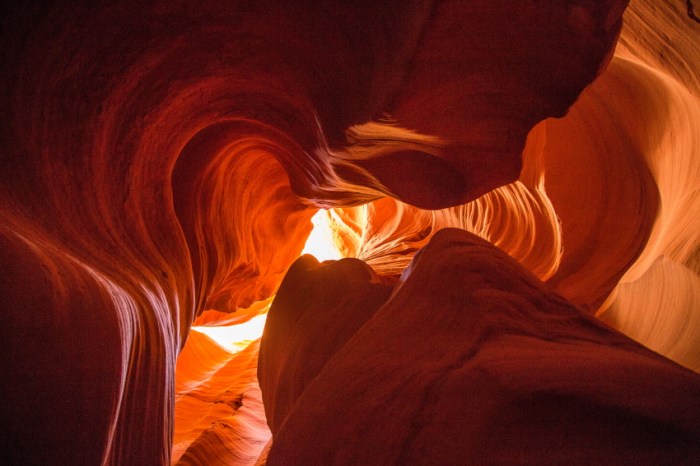
It’s complicated though.  Light is bright and shadows are dark, how does one even them out and still add emotion, mood, and interest?

Tree Shadow_IR.jpg

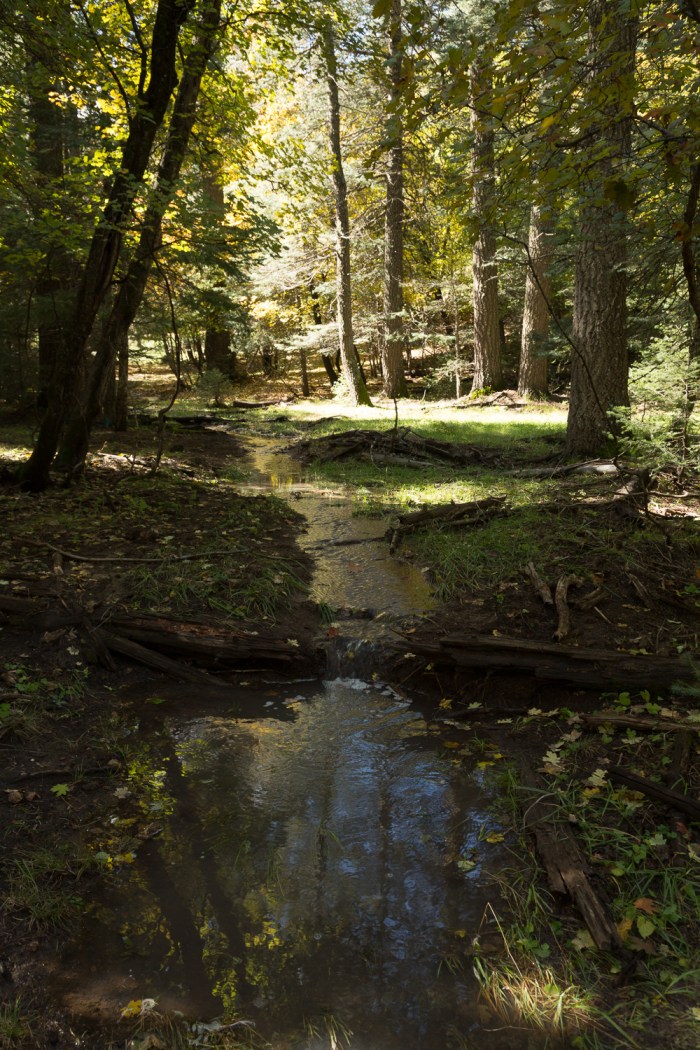
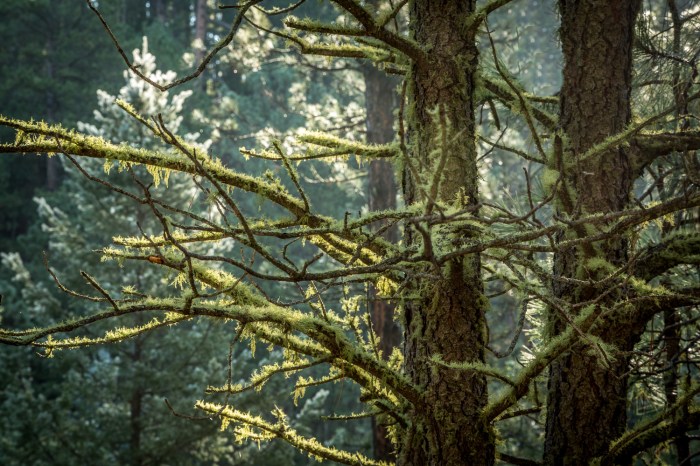
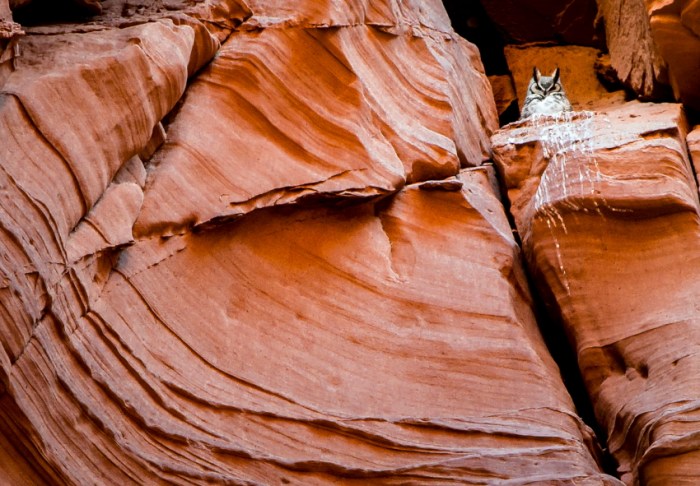
Light is the master of depth.  We need light to make our ‘hero’ shine, or our supporting cast fade into the background.  In this way we can isolate our subject so we know what (or who) it is.

LilTreeBurst_IR.jpg

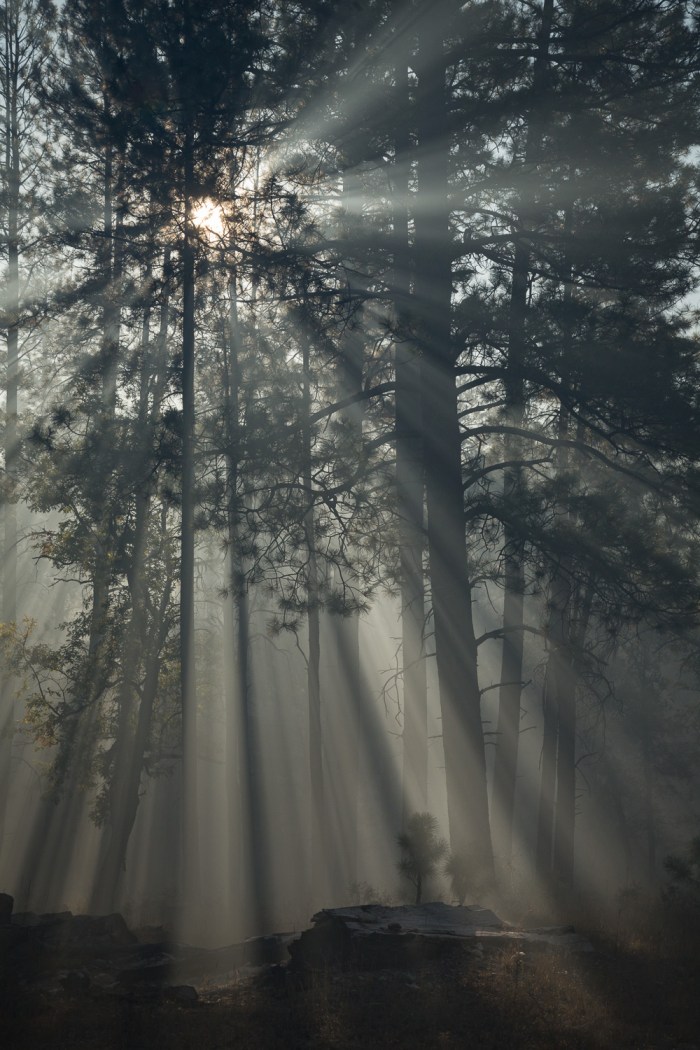
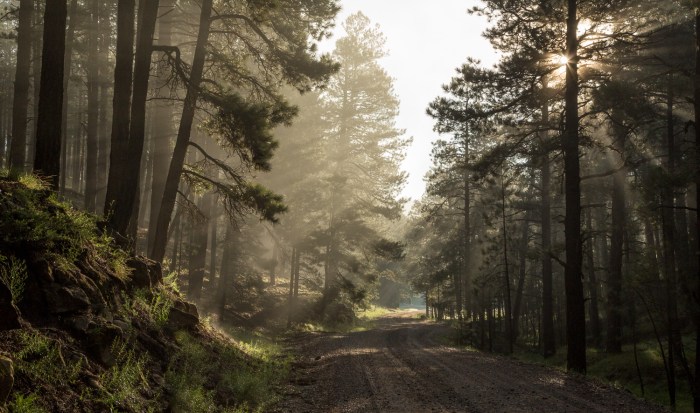
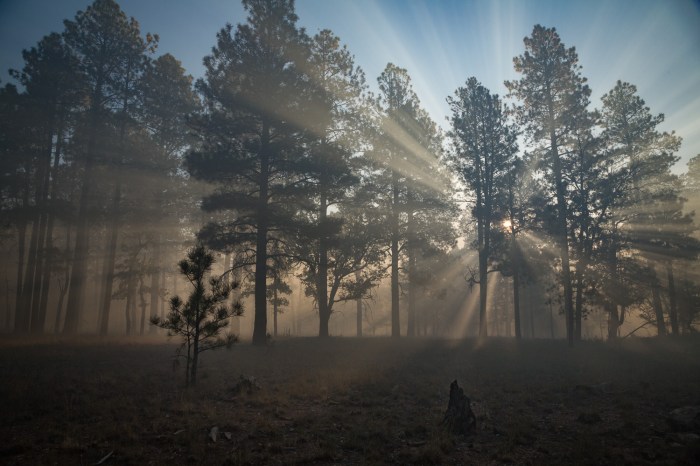
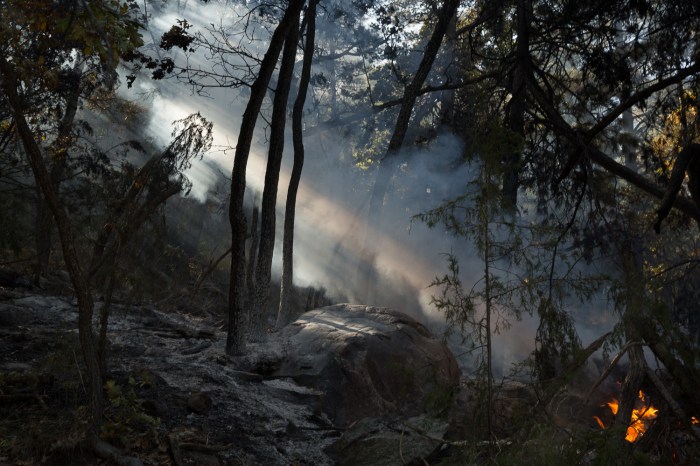
Fog and smoke provide a fantastic mood factor, allowing us to separate the foreground from the background.  While our controlled burns up north can be dreary to look at… they can also make for some very moody exciting pix.

smokeflurry_IR.jpg

Light rays illuminate and become visible through the smoke or fog in the air, distinguishing different elements of the life in the forest.

rokfire_IR.jpg

The fog creates a diffusion through the harsh light, from which comes clarity.

Mind the Shade

maplestream_IR-2.jpg

There are so many things to remember when trying to make a good photograph.  I recently talked about Keep It Clean, and reducing clutter in a photo.  Another important consideration is Shade and Light.

shade_IR.jpg

In the photo above, it’s easy to see the large disparity between exposures – intense shade and shadows in the water, and blown highlights in the sky and trees.  To make the photo successful, I could have done an HDR to take multiple photos with the proper exposure for each separate condition (Shadow & Highlights), and them merged them later.

shadecut_IR.jpg

Or, using the light that I had, I could cut out the blown highlights in camera, and turned my attention to where the light was more even and exposed for the shadows just by looking down.  Cutting out the highlights yielded a more interesting and focused composition.

Remember… mind the Shade & Light, when composing that pic.


Morning Light

We often head out to the rim for morning animal shots.  It makes for a beautiful drive, and awesome scenery.  If we’re lucky we see animals… and even luckier if I get a good shot.

fogglare_IR.jpg

This particular morning we saw NO animals… but we did get some moody light, that made for some interesting shots.

mosstree hort_IR.jpg

The rain and dew provided cool back light opportunities.

raybeamstar_IR.jpg

I just loved the way the light streamed in between the trees.  It created such a picturesque scene as we drove through our forest.

Slot Canyons

2wayarch2PSi.JPG

Slots canyons are a landscape that is reminiscent of the desert southwest.  They are completely unique to Arizona / Utah area.  It’s not like they are common in Florida or Maine.  They are canyonesque shapes and textures that are unique unto themselves.

Here in Arizona they are common through the Indian Reservations… which unfortunately makes them expensive.  But there are other less accessible places to enjoy them, though they do require knowledge, agility, and a hike to get there.

bearPSi.JPG

They also require, if you’re so inclined, finesse in capturing them photographically.  Slot canyons are an illusive subject matter with their sandstone form and varying light.  They represent an abstract challenge to capture visually.

swirlPSi.JPG

j beam lookPSi.JPG

For me, they are difficult to capture.  Maybe because I tend to photograph tangible subjects like wildlife and landscape.  Photographing something abstract takes imagination.  You must see the shapes, contours and contrasts without washing out the colors.  It’s also technically difficult because the poor (dark) lighting conditions require a tripod … and a cloudy white balance setting promotes the orangey hue.  Pity I don’t have more opportunity to practice.

sandwavePSi.JPG

faceptgPSi.JPG

owlfar hortPSPSi.JPG

Light Painting

lightpaint basicPSi

I have never done light painting before, so this was my first time.  I was surprised at what you could do with it… and how easy it was really.  Set your tripod up on your night time scene.  Dependent on your aperture and focal length, focus around 50′ (light up something approx that distance away and focus.. then turn all lights off).  At your lowest aperture f2.8 or f4.0, set camera on Manual and set to a 30 second exposure.  Fire a test shot to be sure your exposure and composition look about right.

Then run across the scene like a crazy person twirling colored lights (not too bright of lights).

lovePSi

davinciPSi

I’m not sure how practical this technique is.. but it was fun and interesting none the less.  Thanks to Scott Stulberg for showing us.  Pretty cool.

Check out my other Sedona pix at https://kritterspix.com/pix and http://kritterspaw.com